Butt Fusion Heater Plate Temperature: Calibration, Cleaning, and Common Failure Signs
- Share
- publisher
- Riyang
- Issue Time
- Aug 19,2026
Summary
Heater plate temperature is the single most influential control in HDPE butt fusion. This guide explains why displayed temperature can differ from the surface the pipe sees, how to verify temperature at multiple plate positions, safe cleaning and contamination control, PTFE coating care, cold-spot diagnosis, dummy welds, and calibration records. Includes a diagnostic table, checklist, and FAQs for welders and quality supervisors.
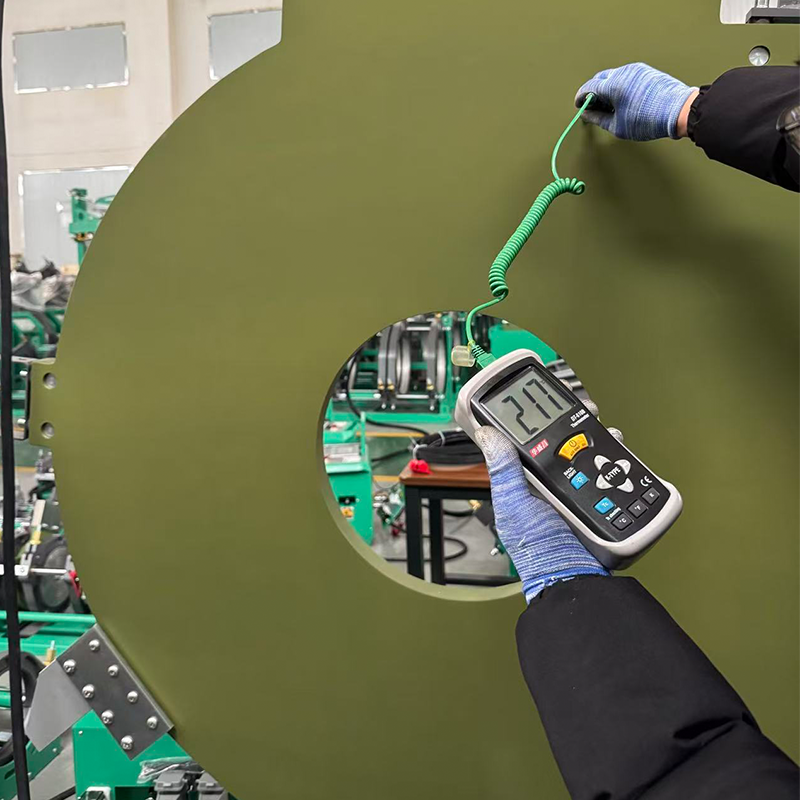
Direct answer: A butt fusion heater plate is typically set to a working surface temperature in the range of 200–230 °C, with a common setpoint of 220 °C. The exact value is not universal—it must come from the pipe manufacturer’s approved procedure and the standard your project works to. The temperature shown on the controller is not the temperature the pipe ends actually see, so verification with a calibrated surface-contact thermocouple, correct warm-up time, and disciplined cleaning are what keep joints sound. Heater plate temperature is the single most influential control in butt fusion of polyethylene (PE) pipe. The plate must deliver consistent heat across its entire pipe-contact face for the bead-up and heat-soak phases to form a fully fused, leak-tight joint. When temperature is off, everything downstream suffers: weak fusion, cold lap, sticking, or thermal degradation of the pipe material. This guide walks through how to verify plate temperature, keep the plate clean, recognize failure signs, and document calibration—using engineering language and clearly separating what is mandatory from what is manufacturer guidance. The controller readout reports the temperature measured by the machine’s internal sensor, which is usually positioned close to the heating elements or in the plate body. That reading is a control-loop value, not a guarantee of what the pipe end feels. Between the sensor and the pipe-contact face there is always some thermal gradient, and the outer edge of the plate cools faster than the centre, especially in open or windy site conditions. Several practical factors widen the gap between the displayed value and the true surface temperature: edge cooling and wind chill, plate wear or coating thickness variation, a failed or drifting element in one zone, and an uncalibrated controller or sensor. This is why commissioning checks measure the surface directly rather than trusting the display. Riyang’s own operating guidance describes using a surface-contact thermocouple with a calibrated temperature display to confirm the plate is correct before welding. A single point reading cannot confirm that the whole contact face is uniform. The correct practice is to measure the surface temperature at several positions on both sides of the plate and around the full circumference that will contact the pipe ends. Take readings at the centre and near the outer edge, and allow a few seconds for the contact probe to stabilise at each point before recording the value. Use a calibrated surface-contact thermocouple rather than relying only on a non-contact infrared thermometer. A non-stick PTFE coating has an emissivity that can make handheld IR readings misleading, so a contact probe is the more dependable tool for this check. Record the readings against the machine setpoint and the ambient conditions; a consistent, repeatable pattern across the face is the goal.1. Why displayed temperature and surface temperature can differ
2. Checking temperature at multiple plate positions
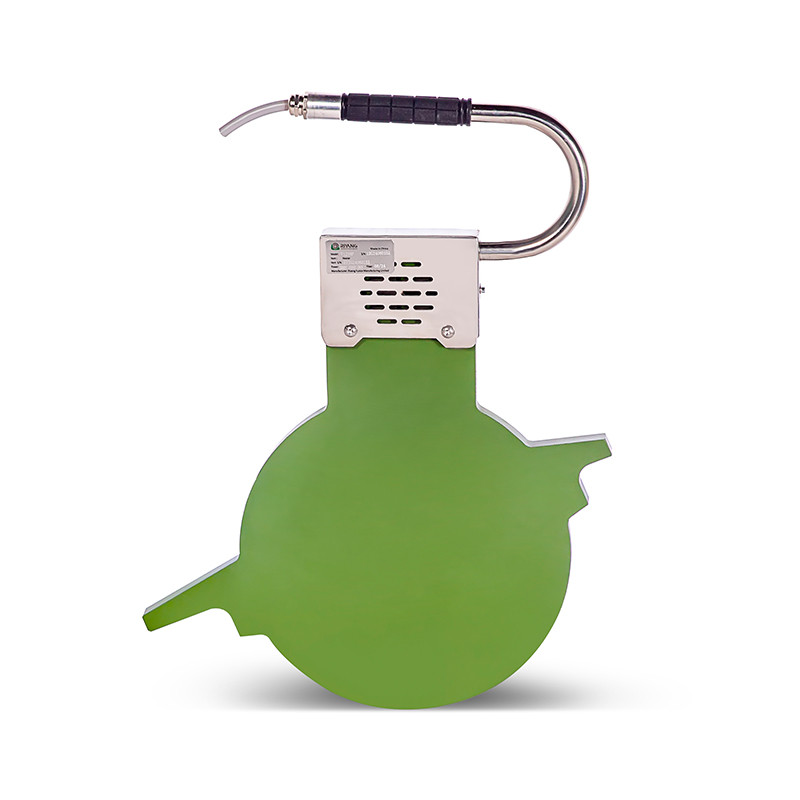
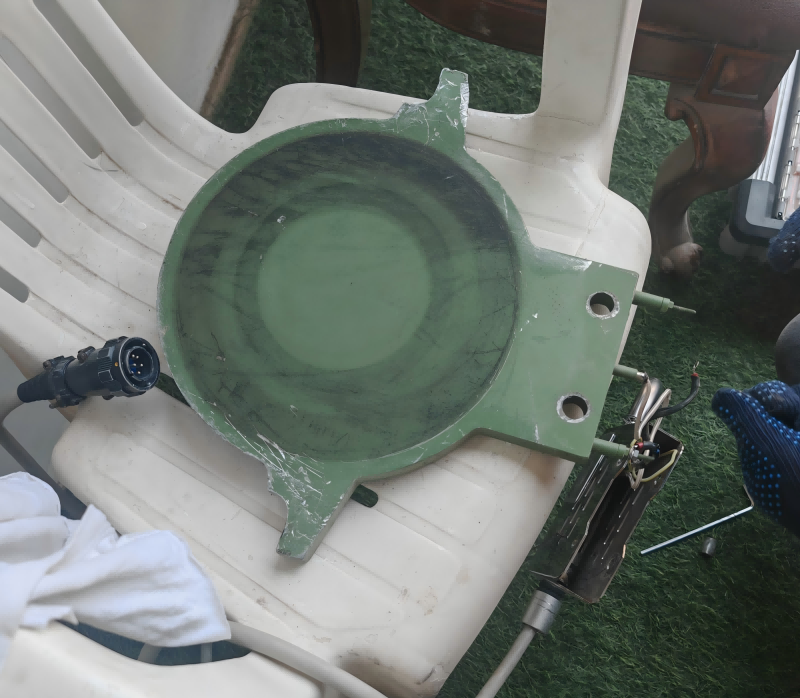
The plate must reach its working temperature and then be allowed to stabilise before the first weld. A plate that is only “up to temperature” at the sensor has not necessarily reached a stable, uniform condition across the contact face. Welding too early on a cold or unevenly warmed plate produces under-heated first joints, while the plate continues to rise during the shift. Follow the warm-up time given in the machine manual, and extend it in cold ambient conditions or when the machine has been stored outdoors overnight. The practical sequence from Riyang’s commissioning guidance is to warm the plate to working temperature, wait until it is stable, and only then take the manual surface measurements that confirm it is correct. Stabilization, not just reaching the setpoint, is what matters. Contamination on the plate—grease, oil, dust, or organic debris—transfers directly into the molten pipe ends and compromises the joint. The safe way to clean a heater plate is to do it while the plate is cold: this avoids burns, prevents solvent from flashing on a hot surface, and lets you inspect the full face. Use disposable, single-use, lint-free cloths so that cloth fibres are not left behind, and use isopropanol when grease or oil must be removed. Do not scrape the plate with metal tools or abrasive pads, because this damages the non-stick coating. After cleaning, run the plate in and out of its protective sleeve a few times to confirm it is not being recontaminated from a dirty cover, then keep the plate in its sleeve whenever it is not in use. A clean plate that is recontaminated between cleaning and welding is a common and avoidable failure. Most butt fusion heater plates are finished with a non-stick PTFE (polytetrafluoroethylene) anti-adhesion coating. Its job is to stop molten PE from adhering to the plate when the pipe ends are pressed against it. When that coating is scratched, peeling, or worn through, melted material can stick to the plate, tear the bead, and leave residue that contaminates the next joint. Inspect the coating as part of every pre-weld check, looking for scratches, flaking, discolouration, or bare metal. If damage is visible, the plate should be repaired or re-coated according to the manufacturer’s instructions before further welding. Never use a wire brush or a metal scraper to remove stuck material—this is a primary cause of coating damage in the field. A cold spot is a localised area of the plate that does not reach the required temperature. Because butt fusion depends on uniform heat input, a cold region on the plate produces a correspondingly under-heated region in the joint—an area of weak or incomplete fusion that may pass a visual bead check but fail later under pressure. The usual causes are a failed or failing heating element, a loose electrical connection, or a damaged zone in the plate. The reliable way to find one is to map the surface temperature at multiple points while the plate is at setpoint; a consistently cold region that does not recover points to a hardware fault rather than a warm-up issue. The table below summarises the common symptoms. A dummy weld is a normal weld cycle that is aborted after the initial bead-up phase, so the molten pipe end is allowed to cool and is then re-machined before the real joint is made. Its purpose is to pull fine dust and debris out of the hollows of the textured plate surface. It is standard practice at commissioning and after any cleaning or relocation of the machine, and larger pipe sizes often call for two dummy welds. After a machine is installed, cleaned, and debugged in this way, the first real joint should be allowed to cool fully, cut, and destructively tested to confirm the machine, the operator, and the chosen parameters produce a sound weld. This first-joint check closes the loop between plate temperature and joint quality before production welding begins. For model-specific setup and operator guidance, refer to Riyang’s training center. Calibration means checking the machine’s temperature measurement against a traceable reference so you know the displayed value is trustworthy. There is no single universal interval that applies to every machine; the required frequency is set by the manufacturer’s instructions, the project quality plan, and any applicable standard. Treat the manufacturer’s recommended interval as the baseline and shorten it where site conditions, transport, or heavy use justify it. Keep a written record of each check, including the date, the reference instrument used, the measured surface temperature at multiple positions, and any adjustment made. These records are part of the joint-quality trail and become important evidence if a joint is ever questioned. As a minimum, the checks below should be part of a working calibration routine. Butt fusion is governed by regional standards and by the pipe manufacturer’s procedures, and these—not a generic default—define the correct temperature and the full set of welding parameters. In the United States, ASTM F2620 is the standard practice for heat fusion joining of PE pipe and fittings; other regions reference their own equivalents. ASTM F2620 itself directs the welder to consider the manufacturer’s instructions when developing or using a specific fusion procedure. This means the practical rule is: do not copy a temperature value from one standard, region, or pipe grade into another. Use the value stated in the approved procedure for the specific pipe material and application you are welding, and confirm the pipe manufacturer approves that procedure. Riyang’s published guidance on initial settings and welding efficiency, linked in the references below, illustrates the range typically used with its machines. Riyang’s guidance describes a working range usually of 225–240 °C with a typical setpoint of 230 °C, but the value you must use is the one in the approved procedure for your pipe material and the applicable standard—never a generic default. Check the plate surface with a calibrated surface-contact thermocouple at several positions on both faces and around the full circumference, and compare against the setpoint after the plate has stabilised. Sticking is usually a sign of a damaged, scratched, or worn non-stick PTFE coating, or of contamination on the plate face. Inspect the coating and clean the plate rather than scraping with metal tools. A failed heating element, a loose electrical connection, or a damaged zone in the plate are the most common causes. A region that stays consistently low after full warm-up points to a hardware fault. There is no single universal interval. Use the frequency in the manufacturer’s instructions and your project quality plan, and re-check after transport, element repair, or coating work. A dummy weld follows a normal cycle but is aborted after bead-up so the cooled pipe end can be re-machined. It removes fine dust and debris trapped in the textured plate surface before the first real joint. For model-specific heater plate guidance and calibration support on your machine, review Riyang’s butt fusion welding machines and contact our team to schedule a calibration review.3. Warm-up and stabilization time
4. Safe cleaning methods and contamination prevention
5. PTFE coating wear, scratches and sticking pipe
6. Cold spots and failed heater elements
Symptom Likely cause First check / action One region reads 10–30 °C low and stays low Failed heating element or zone Map surface temperature; confirm with contact probe; service element Whole plate slow to reach setpoint Low supply voltage or warm-up too short Verify supply; allow full stabilization time Erratic, drifting temperature Faulty sensor or loose connection Check sensor and terminations; verify against calibrated probe Edge consistently cooler than centre Edge cooling / wind chill Shield the work area; check positioning and cover 7. Dummy welds and first-joint precautions
8. Calibration frequency and records
9. Standard-specific settings: use approved procedure values
Key Takeaways
Frequently Asked Questions
What temperature should a butt fusion heater plate be set to?
How do I know the displayed temperature is correct?
Why does pipe stick to the heater plate?
What causes a cold spot on a heater plate?
How often should a heater plate be calibrated?
What is a dummy weld and why is it needed?
References